# Q-Learning Terrain Navigator
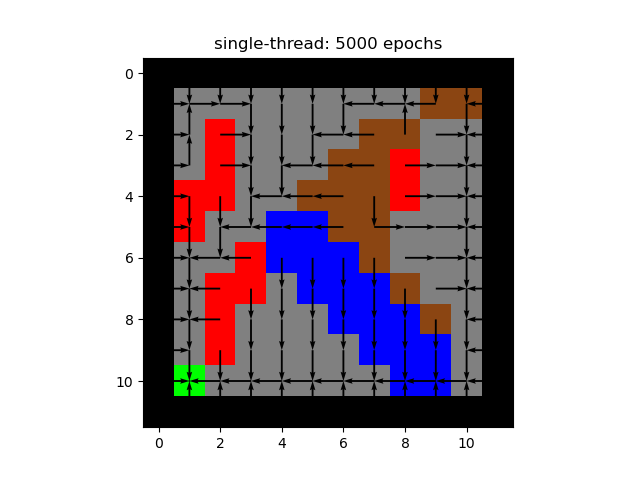
This repository demonstrates the application of Q-learning algorithm in a jupyter notebook environment. The Q-learning algorithm is used to navigate a terrain map and learn the optimal path.
## Jupyter Notebook
 ### Description
This notebook show how Q-learning works and demonstrate how it can learn to navigate a terrain map and find the optimal path to travel down. This map made using a pygame program that allows you to interactavly draw out the different parts of the terain.
### Features
- Create a map for the Q-learning algorithm to try using pygame
- Visualize the map and q-table using a matplotlib
- Implement a multi-threaded version of Q-learning
- Compare different hyper paramaters of Q-learning algorithm
### Requirements
- Python 3.x
- `jupyter lab` or `jupyter notebook`
```bash
pip install numpy, matplotlib, threading, tqdm,
```
## Pygame Map Builder
 ### Description
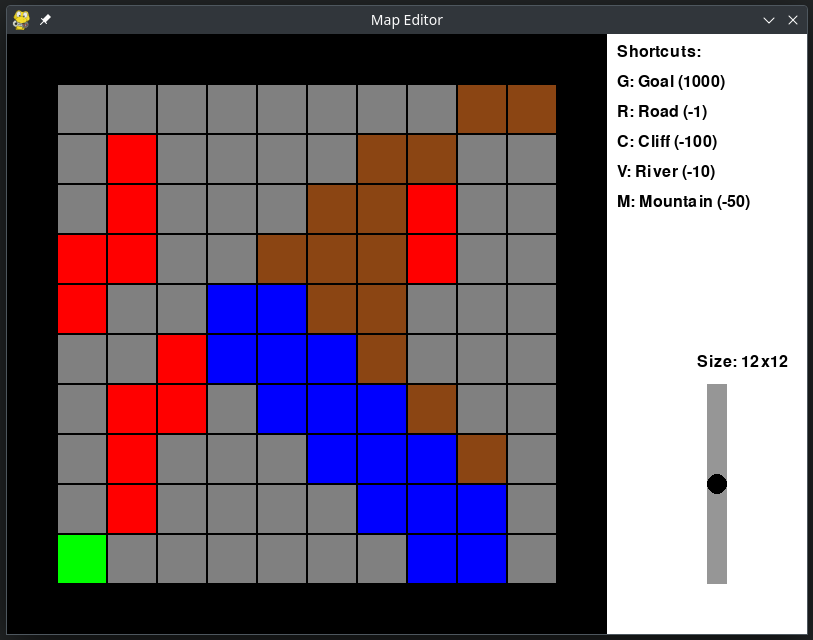
This Pygame-based map editor allows users to generate, edit, and save custom maps. Users can define grid sizes, place various terrain types, and automatically apply boundary walls around the grid. The map is saved to a JSON file, and it will load from the file if it exists on startup.
### Features
- **Adjustable Grid Size**: Use the slider on the right to set the grid size from 5x5 to 15x15.
- **Terrain Types**: Place different terrain types using keyboard shortcuts.
- **Boundary Walls**: Automatically creates a boundary with walls (-1000) around the grid.
- **Save/Load Functionality**: The map is saved to and loaded from `map_data.json`. If you have already created a map it will automatically detect that and load it on start, so you can make simple changes without having to rebuild it again.
### Controls
- **Slider**: Adjust grid size (5x5 to 15x15) using the slider on the right panel.
- **Mouse Click**: Click inside the grid to select a cell and place terrain based on the active key shortcut.
### Terrain Shortcuts:
- `G`: Place **Goal** (1000)
- `R`: Place **Road** (-1)
- `C`: Place **Cliff** (-100)
- `V`: Place **River** (-10)
- `M`: Place **Mountain** (-50)
### How to Use
1. **Start the Program**: Run the Python script to start the map editor.
2. **Set Grid Size**: Use the slider on the right panel to adjust the grid size between 5x5 and 15x15.
3. **Edit the Map**: Click on cells and use the keyboard shortcuts to place terrain types.
4. **Save/Load**: On exiting, the current map is saved to `map_data.json`. The map will automatically load the next time the program is started if the file exists.
### Requirements
- Python 3.x
- `pygame` library
- `numpy` library
### Installation
Install dependencies using:
```bash
pip install pygame numpy
```
### Running the Program
```bash
./map_generator
```
 ### Description
This notebook show how Q-learning works and demonstrate how it can learn to navigate a terrain map and find the optimal path to travel down. This map made using a pygame program that allows you to interactavly draw out the different parts of the terain.
### Features
- Create a map for the Q-learning algorithm to try using pygame
- Visualize the map and q-table using a matplotlib
- Implement a multi-threaded version of Q-learning
- Compare different hyper paramaters of Q-learning algorithm
### Requirements
- Python 3.x
- `jupyter lab` or `jupyter notebook`
```bash
pip install numpy, matplotlib, threading, tqdm,
```
## Pygame Map Builder
 ### Description
This Pygame-based map editor allows users to generate, edit, and save custom maps. Users can define grid sizes, place various terrain types, and automatically apply boundary walls around the grid. The map is saved to a JSON file, and it will load from the file if it exists on startup.
### Features
- **Adjustable Grid Size**: Use the slider on the right to set the grid size from 5x5 to 15x15.
- **Terrain Types**: Place different terrain types using keyboard shortcuts.
- **Boundary Walls**: Automatically creates a boundary with walls (-1000) around the grid.
- **Save/Load Functionality**: The map is saved to and loaded from `map_data.json`. If you have already created a map it will automatically detect that and load it on start, so you can make simple changes without having to rebuild it again.
### Controls
- **Slider**: Adjust grid size (5x5 to 15x15) using the slider on the right panel.
- **Mouse Click**: Click inside the grid to select a cell and place terrain based on the active key shortcut.
### Terrain Shortcuts:
- `G`: Place **Goal** (1000)
- `R`: Place **Road** (-1)
- `C`: Place **Cliff** (-100)
- `V`: Place **River** (-10)
- `M`: Place **Mountain** (-50)
### How to Use
1. **Start the Program**: Run the Python script to start the map editor.
2. **Set Grid Size**: Use the slider on the right panel to adjust the grid size between 5x5 and 15x15.
3. **Edit the Map**: Click on cells and use the keyboard shortcuts to place terrain types.
4. **Save/Load**: On exiting, the current map is saved to `map_data.json`. The map will automatically load the next time the program is started if the file exists.
### Requirements
- Python 3.x
- `pygame` library
- `numpy` library
### Installation
Install dependencies using:
```bash
pip install pygame numpy
```
### Running the Program
```bash
./map_generator
```